Errhile’s DIY Terrain – Cardbuilding #1

Cardbuilding #1 – basics & required equipment
Cardboard / fibreboard / chipboard is a pretty interesting medium if you want to make your own table. It is cheap and easy to obtain, and not that difficult to process.
It is also quite durable – in my gaming group, we have a number of cardboard – made buildings that are close to 4 years old, and despite being stored in a pretty moist environment, they still work just fine, with only a drop of glue being needed here and there once in a few months.
The material
It can be found under a number of names in different countries – cardboard, extra heavy chipboard, fibreboard, binder’s board, mounting board – basically, it is thick, stiff grayish paperboard. You should be able to find it in your local artist’s store in different thickness. Myself, I’m using 3mm thick one at the moment, and I believe 2mm would be fine as well (I did a couple of small pieces with it). I’d have to check the 1mm though.
The thicker you get, the stiffer and sturdier it should be (also, a bit more expensive). Still, thinner variants are easier to cut, and I’m sure 3mm thick would be sturdy enough.
How expensive, you ask? Well, the 3mm sheet I’m working with at the moment costed me about 2,5 EUR / 3 USD for a 70x100cm piece.
The tools
You’ll need some basic tools to work with the chipboard:
1. Drawing supplies.
- Set square (or two),
- a well-sharpened pencil,
- you may want to use some of the more advanced technical drawing tools, like compass, French curves., a separate ruler, various templates and so on, but they are not necessary.
As you can see, nothing your nearest stationery wouldn’t hold in stock (or just dig up the set you’ve used back in school ;)).

2. Cutting supplies.
- Cutting mat. It will protect whatever surface you cut on, keep down the wear of your blades, and stop the cardboard from sliding on your workbench.
- Knives. I use Olfa craft knives with segmented, snap-off-if-dull blades – one small, and one large. Don’t go for cheap knives – it is not only your comfort, but also your safety at stake. Have a supply of spare blades at hand – cutting paper dulls blades rather quick, and having a sharp one is paramount for effective work. Yes, I know we’re all adult and responsible, but beware: these knives are sharp like hell. And they’re even more dangerous if dulled…
- Metal ruler. No, the plastic / wooden one that was fine for drawing is not suitable here – you want something thick and hard, so the blade won’t drift into your fingers! Also, something the knife won’t be peeling it off every time you pass it along… I’ve seen beautiful steel rulers on sale – with rubber anti-slip inserts and special finger protection, and so on, but they were rather expensive, so myself, I’m keeping to an aluminium beam, leftover from a different project.

Keep in mind that even with a fresh blade, you may need 3-4 passes with a knife to make a cut thorough. I could perhaps do it in 1 pass with my small one, but I reserve that for small cuts. The large knife is what I do most of the work with – like, building walls – because it fits the hand better, and is generally more suited to handling pressure. That, and the blade is more stiff, too.
If that means I have to take on average 5 passes to cut thorough a 3mm cardboard, so be it.
First two cuts are rather delicate and made along the ruler, as to estabilish a line. Then I cut within the line with some more pressure as many times as it takes.
3. Gluing – there’s putting it together. Luckily, chipboard reacts fairly well to a number of adhesives. Some common ideas are:
- Superglue. Especially the thin varieties – they tend to soak into fibreboard and turn it into kind of plastic-like, composite material. However, you’d need a lot of it (which generates costs), and cyanoacrylate isn’t the most health-friendly stuff there is – at very best, it is an irritant. Superglue is fine for limited – area applications, like repairs to your chipboard models.
- Hot glue (with a hot glue gun). Personally, I’m not a fan – I find it difficult to apply in a precise way, and contact surfaces tend to be thin but long.
- PVA glue, aka white glue – easy to obtain, doesn’t have that smell, water soluble when wet? That’s the stuff we want, especially the thinner variety that is going to soak into the material (keep in mind – you might prefer to apply it with a brush) – the one I use now was labelled as “PVA Glue, bookbinder’s”, though I got it form a DIY store.

4. Finishing – It is hardly mandatory, but simply makes the tabletop look better 🙂
- Putty. Cutting fibreboard isn’t a precise work, and there may be some spaces left. Filling them with epoxy putty like Green Stuff will get expensive rather quick. Take some fine putty from the DIY store, make sure it is sandable, and you’re good to go. Styrene putties should work fine, but they aren’t too healthy, so I’d avoid them.
- Glue, again. Chipboard can end with ugly edges after you cut it, and the tiny lil’ bits tend to be too flimsy to be easily cut away. You will need the glue to set them stiff, then cut off. Also, you will want to seal the edges before painting.
- Paint. I’ve found that cardboard reacts well to acrylic spraypaints, which also protects it from moisture.
- Sanding. First coat of spray tends to make the board rough with small, delicate fibers that don’t look well at all (though this is more prominent with cardboard that spent some time in storage, especially if the storage was pretty moist…). I use a metal wire mesh “sponge” (one that was intended for kitchen use, actually – you know, what you use to deal with really dirty cooking pot) to file these off, before adding subsequent layers of paint.

Designing from scratch means you will have to plan in advance. And sometimes redo a piece, if you hadn’t planned it well enough.
Fibreboard can have tendencies to split, if put under stress from some directions. Make sure the contact surfaces for gluing are large enough. Also, sealing the edges with a little PVA seems to help.
Also, if you plan to use salt weathering, sealing the edges with PVA Glue is a good way to stop them from soaking the water in – the basecoat of paint won’t be enough for that.
So, that would be the basic introduction to making terrain from cardboard. We should go and try some easy (and useful) design – but that would be part 2.

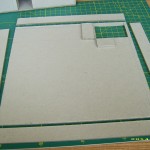
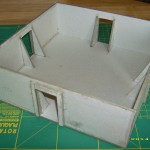
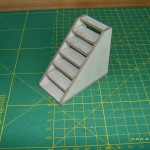
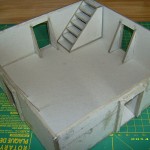
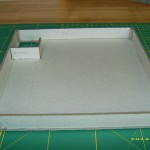
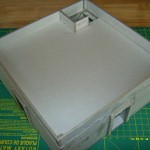
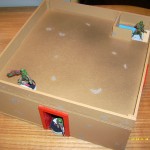
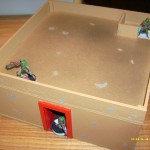




A little update – I’ve recently got myself a metal ruler from art store, means pecifically for cutting. It is ergonomically profiled, with anti-slip rubber inserts on the underside and a steel edge reinforced for cutting.
Yes, it costed me an arm and leg for a ruler. But having used it yesterday I can say it does make a difference – cutting became way easier, and the edges are straighter. So – not a necessity, but definitely worth it.
Hey Errhile, just to say thanks for these articles, I’m in the process of starting Infinity now and these are going to be a constant reference during terrain creation. Just to clarify though, is this material ‘mounting board’? Ie a sheet of foam with tough plastic-y card on either side? I have some lying around but it does not take glue – particularly PVA – well as the main surfaces are not porous.
I think he’s using the stuff picture framers use for the mats around photos and stuff for when you get them framed. Different countries call it different things. We call it mat board, commercially, but framers tend to call it mounting board.
It’s 3mm, not the 5mm(ish) which is more normal for foamcore (the foam/plastic or paper sandwich) board.